
Creating a knife sharpening angle guide is an easy DIY project that helps maintain consistent sharpening angles. Use wood, a protractor, screws, and sandpaper to craft a durable guide. Assemble and sand for smooth operation, ensuring precise blade sharpening every time.
Knife sharpening angle guides are essential tools for achieving consistent and precise blade sharpening. These guides help maintain the correct angle between the knife and the sharpening surface, ensuring a sharp, even edge. Whether you’re sharpening a kitchen knife, hunting knife, or other blades, an angle guide simplifies the process and prevents common mistakes. By using a guide, you can master the technique of sharpening at angles like 20 degrees for everyday knives or 25 degrees for heavier-duty blades. This DIY project requires basic materials like wood, a protractor, and screws, making it accessible for anyone looking to improve their sharpening skills. A well-crafted guide ensures accuracy, making knife sharpening easier and more efficient for both beginners and experienced users.
Understanding the Importance of Sharpening Angles
Sharpening angles are critical for achieving a sharp, durable knife edge. The angle determines how the blade interacts with the sharpening surface, influencing both sharpness and edge retention. A consistent angle ensures uniform wear and prevents uneven edges. Different blade types require specific angles—e.g., 20 degrees for everyday knives and 25 degrees for heavier-duty blades. Maintaining the correct angle prevents over-sharpening and extends the knife’s lifespan. Using an angle guide helps eliminate guesswork, ensuring precision and consistency. Proper angles also reduce the risk of damaging the blade during sharpening. By mastering sharpening angles, you can achieve professional-grade results and keep your knives performing at their best for years to come.

Materials and Tools Needed
Gather wood for the base and guide, a protractor for precise angle measurement, screws for assembly, sandpaper for smoothing, and basic tools like a saw and drill.
Wood for the Base and Guide
Choose durable, smooth wood for the base and guide to ensure stability and precision. A hardwood like maple or walnut is ideal due to its strength and resistance to wear. The base should be thick enough to prevent bending, while the guide piece needs to be narrow and straight to accommodate the blade. Properly sand the wood to remove any splinters or imperfections, ensuring a smooth surface for sharpening. This careful selection and preparation of wood will provide a solid foundation for accurate angle alignment and effective sharpening performance.
Protractor for Measuring Angles
A protractor is essential for accurately measuring and marking the sharpening angles on your knife. It allows you to set precise angles, typically between 15 to 25 degrees for most knives, ensuring consistent results. Place the protractor along the blade’s edge to determine the desired angle, then mark the wood guide accordingly. This tool is crucial for both beginners and experienced sharpeners, as it eliminates guesswork and helps achieve the optimal edge. By using a protractor, you can customize the guide for different blade types and ensure accurate alignment during the sharpening process. This step is foundational for creating a reliable and effective sharpening angle guide.
Screws and Drill for Assembly
Screws and a drill are vital for assembling the knife sharpening angle guide. Use small screws to secure the protractor and angle markers to the wooden base. Pre-drill holes to avoid splitting the wood, ensuring a sturdy and durable construction. The drill helps in precisely aligning the components, while screws provide the necessary tension to hold everything in place. This step ensures the guide remains stable during use, allowing for consistent and accurate sharpening. Proper assembly with screws and a drill is key to creating a functional and long-lasting sharpening tool that will withstand repeated use and maintain precision over time.
Sandpaper for Smoothing Edges
Sandpaper is essential for smoothing the edges of your knife sharpening angle guide, ensuring a polished finish. Start with coarse-grit sandpaper (80-100) to remove rough spots and even out surfaces. Progress to finer grits (220-320) for a smoother texture, reducing friction during use. Use a sanding block or flat surface to maintain evenness. Lightly sand all edges and corners to eliminate splinters and burrs, ensuring comfort and safety. After sanding, wipe away dust with a cloth to prepare the guide for assembly. Smooth edges are crucial for precise sharpening and long-term durability, making sandpaper a key tool in crafting a professional-grade sharpening guide.

Basic Tools: Saw, Drill, and Marker
A saw is needed to cut wood for the guide’s base and angle markers. Use a drill to create holes for screws, ensuring precise alignment. A marker helps mark angles and edges clearly. These tools are fundamental for assembling the guide accurately. Start by marking wood with the marker for precise cuts. Cut wood to size using a saw, ensuring smooth edges. Drill holes for screws to secure the guide’s components. These basic tools are essential for a sturdy and functional sharpening guide, enabling precise angle adjustments for sharpening knives effectively. They ensure the guide is both durable and easy to use, making knife sharpening a straightforward process. Proper use of these tools guarantees a well-crafted guide tailored to your sharpening needs.
Constructing the Angle Guide
Constructing the angle guide involves measuring precise angles with a protractor, cutting wood to size, and assembling with screws. Sanding ensures smooth operation for consistent sharpening results.
Marking the Sharpening Angles with a Protractor
Using a protractor, mark the desired sharpening angles (e.g., 20° for straight-edge knives or 25° for thicker blades) on the wood guide. Align the protractor’s base with the blade’s edge and carefully draw the angle lines. Ensure the markings are precise and evenly spaced for consistency. Double-check the measurements to avoid errors. For visibility, use a marker to darken the lines. This step ensures the guide will help maintain the correct angle during sharpening, preventing uneven edges. Properly marked angles are essential for achieving a sharp, functional blade. Once marked, the guide is ready for assembly, providing a reliable tool for precise sharpening.
Assembling the Guide with Screws
Once the angles are marked, use screws to securely attach the guide to the base. Align the guide with the base, ensuring proper positioning for consistent sharpening. Drill pilot holes to avoid splitting the wood, then insert screws, tightening them firmly. Double-check the alignment to ensure the guide is straight and even. Use a screwdriver or drill with a screwdriver bit for precise tightening. Make sure the screws are not overtightened, as this could damage the wood. The assembled guide should feel sturdy and ready for use. Proper assembly ensures the guide will hold the correct angle during sharpening, making the process easier and more precise. This step is crucial for the functionality of the sharpening guide.
Sanding the Guide for Smooth Operation
Sanding is a critical step to ensure your knife sharpening angle guide operates smoothly. Start by using coarse sandpaper to remove any rough edges or splinters from the wood. Progressively switch to finer grits, such as 120, 220, and 320, for a polished finish. Sand all surfaces, including the edges where the blade will slide. This step prevents splinters and ensures the guide moves effortlessly during sharpening. Use a sanding block for flat surfaces and a file for curved or angled areas. After sanding, wipe away dust with a clean cloth. A smooth guide reduces friction and allows for precise control, making the sharpening process more efficient and effective. Proper sanding ensures longevity and optimal performance of your homemade sharpening guide.

Using the Knife Sharpening Angle Guide
Using the knife sharpening angle guide ensures consistent and precise sharpening. It helps maintain the correct angle, making the process easier and more effective.
Setting the Blade at the Correct Angle
Setting the blade at the correct angle is crucial for effective sharpening. Use the guide to position the knife at the desired angle, ensuring alignment with the bevel; This step ensures consistency and prevents uneven sharpening, making the blade sharper and more durable. Proper alignment also reduces the risk of damaging the blade, allowing for precise control throughout the sharpening process. By maintaining the correct angle, you achieve a sharper edge with minimal effort, ensuring optimal performance for various tasks. This method is particularly useful for both novice and experienced users, providing a reliable way to achieve professional-level results at home.
Ensuring Accuracy with a Marker Test
Conducting a marker test ensures the guide is set correctly. Color the knife’s edge with a marker and sharpen. If the ink is evenly removed along the edge, the angle is accurate. Uneven removal indicates adjustment is needed. This simple test verifies the guide’s alignment, ensuring consistent results. It’s a quick and effective method to confirm the sharpener is functioning properly, saving time and effort. By using this technique, you achieve a precise edge, enhancing the knife’s performance. This step is essential for both maintenance and achieving professional-level sharpness at home, ensuring every sharpening session yields optimal results.
Sharpening the Knife with the Guide
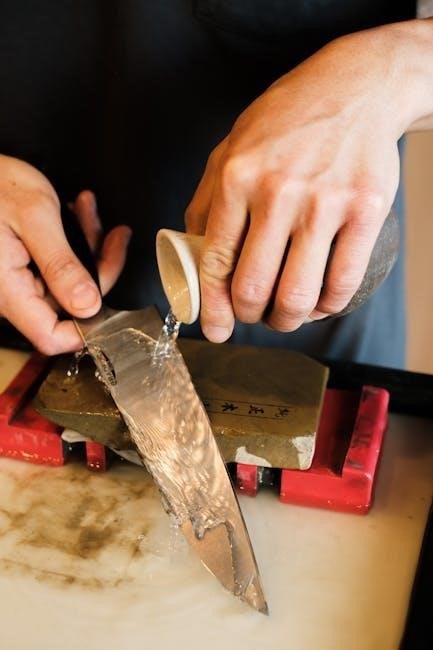
With the guide in place, sharpening becomes precise and effortless. Hold the knife firmly in the guide, ensuring the blade aligns with the marked angle. Slowly draw the knife across the sharpening stone or surface, maintaining consistent pressure. Repeat the motion, checking the edge periodically for sharpness. The guide ensures the angle remains constant, preventing uneven sharpening. For finer edges, reduce pressure on the return stroke. Continue until the blade reaches desired sharpness. This method guarantees a razor-sharp edge every time, making it ideal for both novice and experienced sharpeners. The guide eliminates guesswork, delivering professional-level results with minimal effort.
Customizing the Angle Guide
Adjust the guide for different blade types by modifying the angle settings. Add a tilt box for enhanced precision, ensuring optimal sharpening results for various knife styles.
Adjusting for Different Blade Types
Customizing your knife sharpening angle guide for various blade types ensures optimal results. For straight-edge knives, a 20-degree angle is ideal, while serrated blades may require slight adjustments. Use the protractor to measure and mark different angles on the guide, allowing for versatility. By modifying the tilt box or adding additional angle markers, you can accommodate both straight and serrated edges effectively. This customization ensures that every blade type can be sharpened with precision, maintaining the guide’s functionality across different knives. Adjustments are straightforward, making the guide adaptable to various sharpening needs.
Adding a Tilt Box for Precision
Incorporating a tilt box into your knife sharpening angle guide enhances precision by allowing fine adjustments. Attach the tilt box to the base and align it with the blade’s bevel. This feature ensures the knife remains stable during sharpening, maintaining consistent angles. The tilt box can be calibrated using a protractor for accuracy. By adjusting the tilt, you can accommodate various blade types and edge geometries, ensuring precise control over the sharpening process. This addition elevates the guide’s functionality, making it suitable for both novice and experienced sharpeners seeking professional-grade results.
Maintenance and Care
Regularly clean your knife sharpening angle guide to remove metal particles. Store it in a dry place to prevent damage. Check for loose screws and tighten them as needed. Sand any rough edges to maintain smooth operation. Avoid exposing the guide to direct sunlight or moisture to ensure longevity. By following these care tips, your guide will remain accurate and functional for consistent sharpening results.
Cleaning and Storing the Guide
Cleaning and storing your knife sharpening angle guide is crucial for maintaining its accuracy and longevity. After each use, wipe the guide with a soft cloth to remove any metal shavings or debris. For tougher residue, lightly dampen the cloth with water, but avoid harsh chemicals that could damage the materials. Once clean, store the guide in a dry, secure location to prevent accidental damage or warping. If the guide has movable parts, consider applying a small amount of silicone spray to keep hinges lubricated. Proper storage ensures the guide remains stable and ready for future use, maintaining precise sharpening angles consistently.
Troubleshooting Common Issues
If your knife sharpening angle guide isn’t performing as expected, check for alignment issues or loose screws. Ensure the protractor is securely fastened to prevent shifting during use. If the guide slips, apply a non-slip material to the base. For uneven sharpening, verify that the blade is aligned correctly and that the guide hasn’t warped. Lightly sand any rough edges to maintain smooth operation. If the angles marked with a protractor seem off, re-measure and adjust the markings. Regularly inspect for wear and tear, addressing any damage promptly to maintain the guide’s effectiveness. Proper maintenance ensures consistent results and extends the life of your sharpening tool.
Creating a knife sharpening angle guide is a simple yet effective DIY project. With basic tools and materials, you can ensure precise blade sharpening every time, achieving professional results at home.
Final Tips for Effective Sharpening
Always maintain consistent sharpening angles using your guide for optimal results. Regularly test the blade with a marker to ensure accuracy. Customize the guide for different blade types and angles. Store the guide in a dry place to prevent damage. Troubleshoot issues by checking alignment and tightening screws. Practice sharpening techniques to master the process. Remember, patience and precision are key to achieving a razor-sharp edge. By following these tips, you’ll extend the life of your knives and ensure they perform exceptionally. Keep your guide well-maintained for years of reliable use.
 college football trophy guide
  wow cataclysm classic enchanting guide
  kctv guide
  aerogarden user guide
  window guide clips
  vegetable planting guide zone 9
  litany of the sacred heart of jesus pdf
  spanish worksheets for beginners pdf
  masterbuilt butterball deep fryer manual