
The Ryobi Table Saw is a versatile power tool designed for precise cutting tasks. It offers durability and ease of use, catering to both professionals and DIY enthusiasts.
1.1 Overview of the Ryobi Table Saw Models
Ryobi offers various table saw models, such as the RTS21G and BT3100-1, designed for versatility and precision. These models feature 10-inch blades, portable designs, and robust constructions. They cater to different user needs, from DIY projects to professional tasks. Each model includes unique features like adjustable fences and dust collection ports. The RTS21G is known for its compact size, while the BT3100-1 boasts a larger rip capacity. Users can find detailed specifications and operation guides in the manuals available online, ensuring optimal performance and safety.
1.2 Importance of Reading the Instruction Manual
Reading the instruction manual for your Ryobi Table Saw is essential for safe and effective operation. It provides detailed setup, usage, and maintenance guidelines specific to your model, such as the RTS21G or BT3100-1. The manual outlines safety precautions, proper assembly steps, and troubleshooting tips to prevent accidents and ensure optimal performance. By following the manual, you can avoid voiding the warranty and extend the tool’s lifespan. It also helps you understand features like blade adjustments and rip fence alignment, ensuring precise cuts and enhancing your woodworking experience. Always refer to the manual before operating the saw.

Safety Precautions and Guidelines
Always follow safety guidelines when operating the Ryobi Table Saw to prevent accidents. Wear proper PPE, keep loose clothing tied back, and avoid distractions while cutting materials.
2.1 Personal Protective Equipment (PPE)
Wearing proper PPE is essential when operating the Ryobi Table Saw. Always use safety glasses to protect your eyes from debris. Ear protection is recommended to prevent hearing damage from loud machinery. A dust mask is necessary to avoid inhaling sawdust. Wear steel-toe boots and keep loose clothing tied back to minimize accidents. Gloves can improve grip and control while handling materials. Ensuring all PPE is worn correctly enhances safety and reduces injury risks during operation. Always prioritize protective gear before starting any cutting task.
2.2 Workplace Safety Tips
Maintaining a safe workspace is crucial when using the Ryobi Table Saw. Always ensure the work area is clean and clear of clutter to prevent tripping hazards. Keep children and pets away from the workstation. Never leave the saw unattended while it is running. Ensure proper ventilation to avoid inhaling sawdust and fumes. Store tools and materials in a dry, secure location. Regularly inspect the saw and its components for damage or wear. Keep emergency equipment, such as a fire extinguisher, nearby. Adhering to these tips minimizes risks and ensures a safer working environment.
2.3 Proper Lifting and Handling Techniques
Proper lifting and handling of the Ryobi Table Saw are essential to prevent injury and damage. Always bend at the knees and lift with your legs, not your back, to maintain balance. Ensure the saw is securely grasped or placed on a stable surface before moving it. Avoid lifting by the blade or fence, as this can cause imbalance. Use the handles provided for better grip and control. If the saw is too heavy, consider enlisting help or using a dolly. Store the saw in a dry, level area after use to prevent accidental tipping. Always follow the manufacturer’s guidelines for handling and transportation.

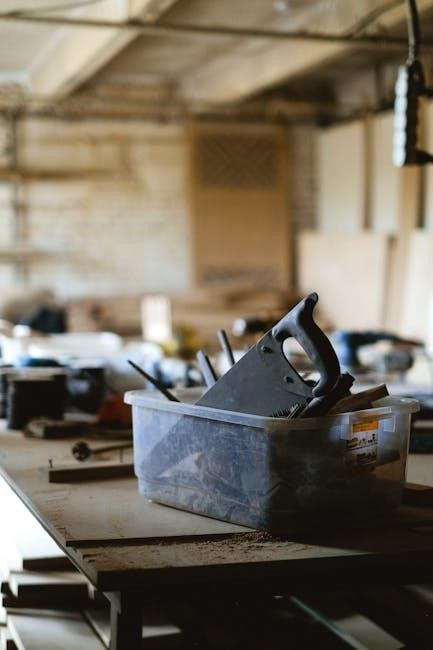
Unboxing and Inventory
Carefully unpack the Ryobi Table Saw, ensuring all components are included. Verify the presence of the table, fence, blade, miter gauge, and wrenches. Check for damage or missing parts before assembly.
3.1 Tools and Accessories Included
The Ryobi Table Saw typically comes with essential tools and accessories, including the table saw unit, rip fence, miter gauge, and wrenches for adjustments. Additional items may vary by model but often include a blade, anti-kickback pawls, and a push stick for safety. Ensure all components listed in the manual are present. Check for any damage or missing parts before proceeding. Properly inventorying these items ensures smooth assembly and operation. Always refer to the instruction manual for specific details on included accessories for your model, such as the RTS21G or BT3100-1.
3.2 Checking for Damage or Missing Parts
Before assembling, thoroughly inspect the Ryobi Table Saw components for damage. Check the table surface, fence, and blade for any scratches or dents. Verify that all parts listed in the manual are included, such as the miter gauge and wrenches. Missing or damaged items can hinder performance and safety. If any issues are found, contact customer support immediately. Proper inspection ensures optimal functionality and prevents potential hazards during operation, as highlighted in models like the RTS21G and BT3100-1. This step is crucial for a safe and efficient setup.

Assembly and Setup
The Ryobi Table Saw requires careful assembly to ensure accuracy and safety. Follow the manual’s step-by-step guide to attach the fence, blade, and other accessories properly.
4.1 Step-by-Step Assembly Instructions
Begin by unboxing and inventorying all parts. Attach the legs to the table using the provided bolts. Next, align and secure the fence, ensuring it is parallel to the blade. Install the rip fence and blade guard according to the manual. Connect the power cord and test the saw at a low speed to ensure smooth operation. Follow the manual’s detailed instructions to avoid errors and ensure safety during assembly. Proper setup is crucial for accurate cuts and longevity.
4.2 Aligning the Table and Fence
Aligning the table and fence ensures accurate cuts. Start by leveling the table using the adjustment screws. Next, position the fence parallel to the blade using a wrench or adjustment knob. Tighten the locking mechanism securely. Double-check the alignment with a ruler or straightedge. Proper alignment prevents uneven cuts and enhances safety. Refer to the manual for specific adjustment techniques. Ensure all bolts are tightened firmly to maintain stability. Misalignment can lead to poor performance, so take time to align carefully. This step is critical for achieving professional-grade results.
4.3 Installing the Blade and Rip Fence
Installing the blade and rip fence correctly is essential for safe and precise cuts. Begin by turning off the saw and unplugging it. Remove any packaging materials. Install the blade by aligning it with the arbor and securing it with the provided washer and nut. Tighten firmly with a wrench. Next, attach the rip fence by sliding it onto the guide rails and securing it with the locking lever. Ensure the fence is parallel to the blade for accurate cuts. Refer to the manual for specific torque specifications. Proper installation ensures optimal performance and safety. Always double-check before use.

Operating the Table Saw
Learn to operate the Ryobi Table Saw safely and effectively. Start by familiarizing yourself with controls and ensuring all safety features are in place. Always maintain a firm grip on materials and keep loose clothing tied back to avoid accidents. Use proper stance and technique to guide materials smoothly. Begin with straight cuts and gradually move to angled cuts as you gain confidence. Refer to the manual for specific operating instructions and guidelines. Practice makes perfect, so start with scrap wood before working on actual projects. Keep your workspace clean and well-lit for better visibility. Always unplug the saw when not in use or during blade changes. Regular maintenance, such as cleaning the table and checking blade alignment, ensures optimal performance. Stay alert and focused to avoid kickback and other hazards.
5.1 Starting the Saw for the First Time
Before starting the Ryobi Table Saw, ensure the workspace is clear of debris and obstacles. Plug in the saw and perform a safety check. Inspect the blade for proper installation and alignment. Wear personal protective equipment, including safety glasses and a dust mask. Turn on the saw at a low speed to test its operation. Gradually increase the speed and observe the blade’s movement. Ensure the fence is secure and the table is clean. Familiarize yourself with the controls and emergency stop. Start with a small test cut on scrap wood to verify accuracy. Always follow the manual’s guidelines for safe startup.
5.2 Making Straight Cuts
To make straight cuts with the Ryobi Table Saw, align the material against the rip fence. Ensure the fence is parallel to the blade. Use a push stick or other safety device to guide the material. Maintain steady pressure and keep your hands away from the blade. Feed the material at a consistent speed to prevent kickback. Avoid applying too much pressure, which can cause the saw to bind. Keep the workpiece flat on the table throughout the cut. Always use proper body positioning for control and visibility.
5.3 Adjusting for Angle Cuts
For angle cuts, adjust the blade to the desired angle using the bevel adjustment lever. Ensure the fence is aligned correctly and secure. Use a miter gauge or sled for precise angles. Always measure and double-check the angle before cutting. Maintain steady control of the material throughout the cut. Keep hands away from the blade and avoid overreaching. Use proper body positioning for visibility and control. Apply consistent pressure to prevent binding or kickback. Ensure the workpiece remains flat on the table for accurate results.
5.4 Working with Different Materials
The Ryobi table saw excels with various materials, including wood, metal, and plastics. Always use the appropriate blade for the material to ensure clean cuts and prevent damage. For wood, a standard carbide-tipped blade works well, while metal requires a specialized blade. Adjust the blade speed according to the material thickness to maintain accuracy. Use a steady feed rate to avoid kickback. Ensure the rip fence is aligned for straight cuts. Keep the workpiece flat on the table for consistent results. Refer to the manual for specific settings and guidelines for different materials.
Maintenance and Troubleshooting
Regular maintenance ensures optimal performance. Inspect for dust buildup, ensure blade sharpness, and follow the manual for troubleshooting common issues. Proper care prolongs tool longevity.
6.1 Routine Maintenance Tips
Regular maintenance is crucial for optimal performance. Clean the table and fence from dust and debris. Check blade alignment and fence accuracy. Lubricate moving parts like the fence rails and blade height adjustment mechanism. Inspect the power cord for damage and ensure all connections are secure. Sharpen or replace dull blades to prevent kickback and improve cut quality. Refer to the manual for specific recommendations on lubricants and maintenance schedules. Consistent upkeep ensures accuracy, safety, and extends the tool’s service life.
6.2 Common Issues and Solutions
Common issues with the Ryobi Table Saw include blade misalignment, uneven cuts, and motor overheating. To address misalignment, recalibrate the fence and blade using the adjustment screws. For uneven cuts, ensure the blade is sharp and properly secured. If the motor overheats, allow it to cool and check for dust buildup. Refer to the manual for troubleshooting guides. Regular lubrication of moving parts and proper blade maintenance can prevent many of these issues. Addressing problems promptly ensures consistent performance and safety. Always follow manufacturer recommendations for repairs.
6.3 Replacing Parts and Accessories
Replacing parts on the Ryobi Table Saw requires careful attention to ensure proper function and safety. Always disconnect power before starting. Common replacements include blades, rip fences, and drive belts. Use genuine Ryobi parts for optimal performance. Refer to the manual for specific instructions on disassembly and installation. Tighten all bolts to the specified torque to avoid vibration or misalignment. Regularly inspect and replace worn components to maintain accuracy and prevent breakdowns. Proper replacement ensures the saw operates efficiently and safely, adhering to manufacturer guidelines.

Accessories and Upgrades
Enhance your Ryobi Table Saw’s performance with essential accessories like dado sets, rip fences, and miter gauges. Upgrading blades and components ensures optimal cutting precision and durability.
7.1 Recommended Accessories for Enhanced Performance
To maximize the functionality of your Ryobi Table Saw, consider adding a high-quality rip fence for precise cuts, a dado set for creating joints, and a miter gauge for angled cuts. A push stick or jig enhances safety, while a splitter or riving knife prevents kickback. Additionally, a dust collection system improves workshop cleanliness, and premium blades ensure superior cutting efficiency across various materials. Upgrading to a mobile cart or stand offers portability, making your Ryobi Table Saw even more versatile for projects around the shop or job site.
7.2 Upgrading Blades and Other Components
Upgrading your Ryobi Table Saw’s blade with a high-quality alternative can significantly enhance cutting accuracy and efficiency. Consider investing in a durable, carbide-tipped blade for general-purpose use or specialty blades for specific materials like metal or plywood. Additionally, upgrading the fence system or miter gauge can improve precision. For better dust management, install an upgraded dust collection port or adapter. Always ensure compatibility with your model and follow the manufacturer’s guidelines for installation. Regularly inspect and replace worn components to maintain optimal performance and safety.
Safety Best Practices
Always wear safety glasses and keep loose clothing tied back when operating the Ryobi Table Saw. Maintain a firm grip on materials and avoid overreaching.
8.1 Avoiding Kickback
Kickback occurs when a workpiece is violently ejected by the saw. To prevent this, ensure the material is properly supported and aligned. Always use a push stick or other safety devices to maintain control. Keep the workpiece flat against the table and fence, avoiding loose clothing or jewelry that could get caught; Never cut freehand or apply excessive pressure, as this increases the risk of kickback. Regularly inspect the blade for damage and ensure it’s sharp, as dull blades contribute to kickback incidents. Maintain a clean workspace to prevent obstructions and distractions during operation.
8.2 Proper Blade Maintenance
Proper blade maintenance is crucial for optimal performance and safety. Regularly inspect the blade for damage, such as chipped or dull teeth, and replace it if necessary. Clean the blade with a solvent to remove debris and resin buildup. Store blades in a dry place to prevent rust. Always ensure the blade is properly aligned after installation. A well-maintained blade reduces vibration, improves cut quality, and minimizes the risk of accidents. Refer to the manual for specific maintenance recommendations tailored to your Ryobi table saw model.
8.3 Emergency Shutdown Procedures
In case of an emergency, immediately turn off the power switch and ensure the blade comes to a complete stop. Do not attempt to remove the material or make adjustments while the saw is operational. If the saw malfunctions, unplug it from the power source to prevent accidental startups. Always maintain control and avoid sudden movements. Refer to the manual for specific emergency procedures, as improper handling can lead to serious injury. Prioritizing safety ensures both operator and equipment longevity.
Frequently Asked Questions (FAQs)
This section addresses common queries about the Ryobi Table Saw, covering assembly, troubleshooting, and maintenance. It provides quick solutions for optimal performance and longevity.
9.1 Common Questions About Assembly
This section answers common questions about assembling the Ryobi Table Saw, such as aligning the fence, installing the blade, and ensuring proper table setup. Users often inquire about the tools needed, the time required, and potential issues like misalignment. Tips are provided for verifying all parts are included and checking for damage before starting. Proper assembly ensures safety and optimal performance; Following the manual step-by-step is highly recommended.
9.2 Troubleshooting Frequently Encountered Problems
This section addresses common issues users face with the Ryobi Table Saw, such as uneven cuts, blade wobbling, or motor overheating. Solutions include checking blade alignment, tightening loose parts, and ensuring proper material handling. Tips on maintaining the saw and preventing future problems are also provided. Regular maintenance, like cleaning and lubricating moving parts, can help avoid many issues; Always refer to the manual for specific troubleshooting steps to ensure safety and optimal performance.
9.3 Best Practices for Longevity
To ensure the longevity of your Ryobi Table Saw, regular maintenance is essential. Clean the saw and its components after each use to prevent dust buildup. Lubricate moving parts periodically to maintain smooth operation. Store the saw in a dry, protected area to avoid rust and damage. Always use the correct blades for your projects to prevent excessive wear. Follow the manufacturer’s guidelines for maintenance and usage. Proper care will extend the life of your tool, ensuring consistent performance over time.
 masterbuilt butterball deep fryer manual
  rivian r1t owners manual
  magic bullet user manual
 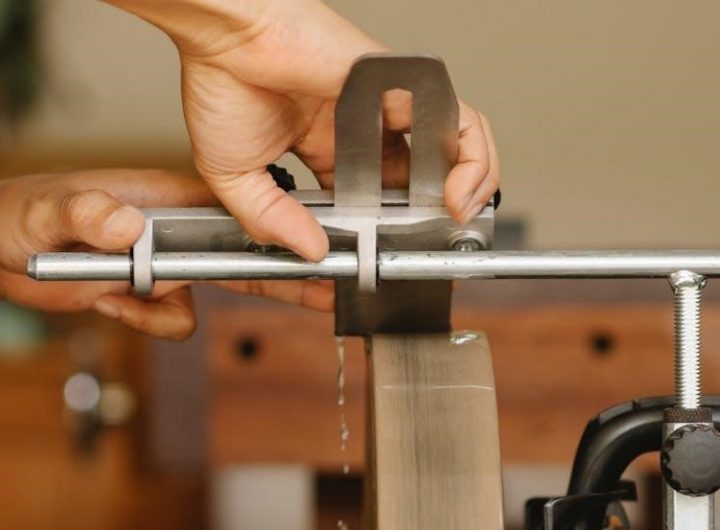 honeywell rth2300 operating manual
  ford ranger manual gearbox
  manual d calculation
  college football trophy guide
  litany of the sacred heart of jesus pdf
  spanish worksheets for beginners pdf