How to Rebuild a Manual Transmission: A Comprehensive Guide
Rebuilding a manual transmission is a complex process requiring mechanical skills‚ specialized tools‚ and patience․ It involves disassembling‚ inspecting‚ and replacing worn parts before reassembling the unit․
Rebuilding a manual transmission is a challenging yet rewarding process that requires mechanical aptitude‚ patience‚ and attention to detail․ It involves disassembling the transmission‚ inspecting its components‚ and replacing worn or damaged parts․ While it can be a cost-effective alternative to buying a new transmission‚ it demands a good understanding of how manual transmissions function․ The difficulty level varies depending on the transmission type and the extent of the damage․ For instance‚ rebuilding a high-performance transmission may involve more complex steps compared to a standard one․ Proper tools and a clean workspace are essential to ensure success․ Many enthusiasts and mechanics find transmission rebuilding a valuable skill‚ as it allows for customization and performance upgrades․ However‚ it is not a project for the faint of heart‚ as it requires precision and time; With the right resources and preparation‚ rebuilding a manual transmission can be a fulfilling DIY endeavor․
Tools and Workspace Preparation
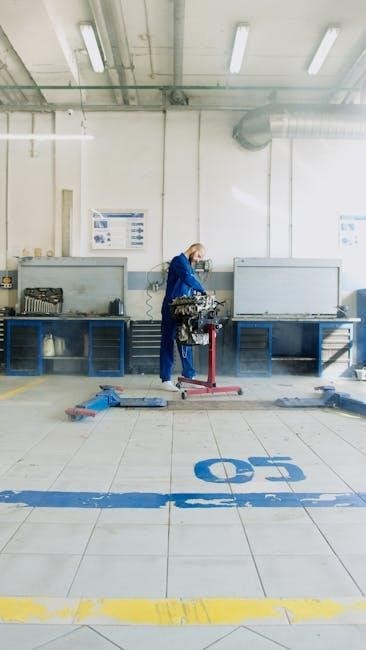
Proper tools and a well-organized workspace are crucial for a successful manual transmission rebuild․ Essential tools include a socket set‚ torque wrench‚ gear puller‚ and bearing press․ A clean‚ flat workbench and storage bins for small parts are also necessary․ Safety gear like gloves and goggles should always be worn․ A drain pan and rags are needed for handling transmission fluid․ Specialized tools‚ such as a transmission jack‚ can simplify the process․ A repair manual specific to your transmission model is invaluable for guidance․ Organizing your tools and parts beforehand saves time and reduces frustration․ A clutter-free workspace helps prevent losing or damaging components․ Additionally‚ having a parts cleaner and a press ensures proper reassembly․ Without the right tools and workspace‚ the rebuild can become disorganized and prone to errors․ Preparation is key to efficiently and effectively completing the task․ Always double-check your tools and space before starting the project․
Understanding Transmission Components
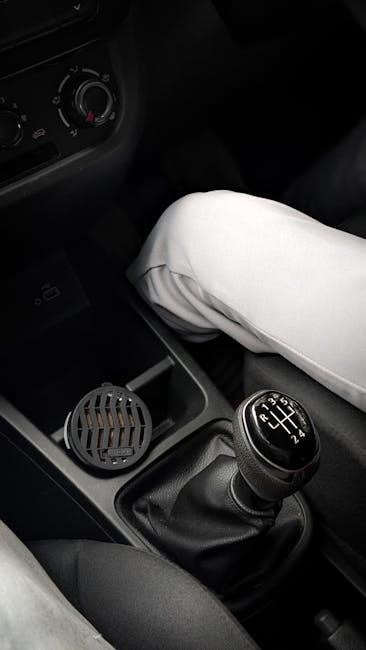
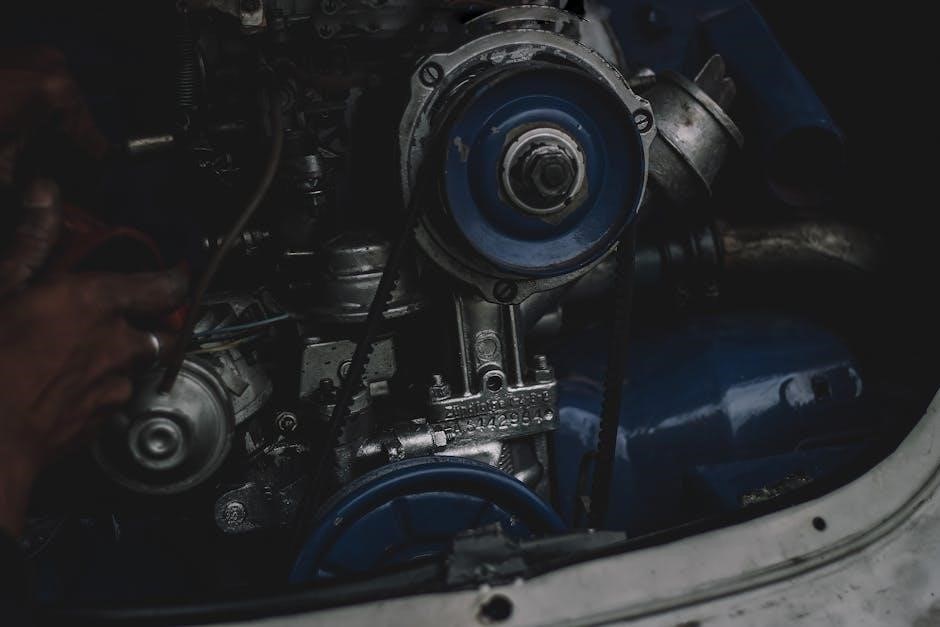
A manual transmission consists of multiple critical components that work together to transfer power from the engine to the wheels․ The gear set‚ including input and output shafts‚ is responsible for changing gear ratios to optimize speed and torque․ Bearings and bushings support these shafts‚ ensuring smooth operation․ Synchronizers facilitate smooth shifting between gears by equalizing their speeds․ The clutch and pressure plate engage and disengage the engine from the transmission․ Understanding each part’s role and how they interact is essential for a successful rebuild․ Familiarizing yourself with components like the gearset‚ bearings‚ and synchronizers helps identify potential issues during disassembly․ Knowing how these parts function ensures proper inspection and replacement of worn or damaged items․ This knowledge is vital for diagnosing problems and selecting the right replacement parts․ Proper understanding of transmission components is the foundation of a successful rebuild․
Safety Precautions and Best Practices
Rebuilding a manual transmission requires strict adherence to safety protocols to avoid injuries and ensure a successful outcome․ Always wear protective gear‚ including gloves and safety glasses‚ when handling tools and components․ Be mindful of spring tension in components like the synchronizer rings‚ as they can release unexpectedly․ Use jack stands to secure the vehicle and transmission during disassembly to prevent accidental crushing․ Keep the workspace clean and well-lit to minimize tripping hazards and improve visibility․ Proper ventilation is essential when working with chemicals like cleaning solvents․ Never force parts apart or tighten them excessively‚ as this can damage components․ Follow torque specifications precisely to avoid stripping threads or causing premature wear․ Regularly consult repair manuals or online guides for specific instructions tailored to your transmission type․ If unsure about a step‚ consider seeking assistance from an experienced mechanic․ Safety should always be the top priority to protect yourself and the integrity of the rebuild․

Preparation and Planning
Proper preparation is crucial for a successful manual transmission rebuild․ Assess the project’s complexity‚ plan your workflow‚ and gather all necessary resources before starting․
Gathering Necessary Tools and Equipment
Rebuilding a manual transmission requires a variety of tools and equipment to ensure the job is done efficiently and effectively․ Start by assembling a well-organized workspace with a sturdy workbench and proper lighting․ Essential tools include a socket set‚ wrenches‚ pliers‚ and a screwdriver set․ Specialized tools like a bearing puller‚ transmission jack‚ and seal installer are also necessary for specific tasks․ Additionally‚ gather materials such as rags‚ cleaning solvents‚ and a parts organizer to keep components tidy․ A service manual specific to your transmission model is invaluable for guidance․ Always verify that all tools are in good condition to avoid complications during the rebuild process․ Having everything ready beforehand saves time and reduces the risk of errors․ A clean‚ well-prepared workspace is key to a successful transmission rebuild․
Sourcing Replacement Parts
Sourcing replacement parts for a manual transmission rebuild is a critical step to ensure functionality and reliability․ Start by identifying the specific parts needed‚ referencing your transmission’s service manual or online resources․ Dealerships offer genuine OEM parts‚ which are reliable but often more expensive․ Aftermarket suppliers provide cost-effective alternatives that may include performance upgrades․ Salvage yards can be a budget-friendly option for used parts‚ but ensure they are inspected for wear․ Online forums and communities often recommend trusted suppliers for transmission components․ Always verify compatibility with your transmission’s make and model to avoid mismatches․ Consider the quality and durability of parts‚ especially for critical components like bearings and gears․ Refurbished or rebuilt parts can offer savings while maintaining performance․ Compare prices and shipping options from various retailers to find the best value․ Proper planning and research ensure you acquire the right parts efficiently․
Consulting Repair Manuals and Guides
Consulting repair manuals and guides is essential for a successful manual transmission rebuild․ These resources provide detailed instructions‚ diagrams‚ and troubleshooting tips specific to your transmission model․ Start with the factory service manual‚ which offers precise specifications and procedures․ Supplement with aftermarket repair guides‚ such as those from Haynes or Chilton‚ for additional insights and step-by-step instructions․ Online forums and communities‚ like Reddit’s r/EngineBuilding or specialized car forums‚ often share real-world experiences and solutions to common challenges․ Video tutorials on platforms like YouTube can visually guide you through complex tasks․ Always cross-reference information to ensure accuracy and compatibility with your transmission․ These resources not only help you avoid costly mistakes but also enhance your understanding of the process․ Keep them handy throughout the rebuild for quick reference and to troubleshoot unexpected issues․
Disassembly Process
Drain the transmission fluid before removing the unit from the vehicle․ Carefully disassemble the case‚ taking note of each component’s location and condition․ Use specialized tools to extract bearings and gears‚ ensuring not to damage internal parts․ Document each step for easy reassembly later․ Maintain a clean workspace to prevent contamination and organize parts systematically․ Safety is paramount when handling sharp or heavy components․ Refer to your repair manual for specific disassembly procedures tailored to your transmission model․
Draining Transmission Fluid
Draining the transmission fluid is the first step in the disassembly process․ Position the vehicle on level ground and engage the parking brake for safety․ Locate the transmission fluid drain plug‚ usually found at the bottom of the transmission pan․ Use a socket wrench to remove the plug and allow the fluid to drain into a suitable drain pan․ Be prepared for the fluid to flow quickly once the plug is removed․ Wear gloves and protective eyewear to avoid any potential splashes․ Once the fluid has completely drained‚ replace the plug securely to prevent leaks․ Properly dispose of the used transmission fluid according to local regulations; This step ensures a clean workspace and prevents contamination during the rebuilding process․ Always refer to your vehicle’s repair manual for specific instructions on locating and draining the transmission fluid․
Removing the Transmission from the Vehicle
Removing the transmission from the vehicle is a critical step that requires careful planning and physical effort․ Begin by raising the vehicle using a hydraulic lift or jack stands to ensure safe access to the underside; Disconnect the negative battery terminal to prevent any accidental electrical issues․ Next‚ remove the driveshaft by marking its position for proper realignment during reinstallation․ Disconnect the shifter linkage‚ clutch slave cylinder‚ and any electrical connectors attached to the transmission․ Drain the transmission fluid beforehand to lighten the unit․ Use a transmission jack to support the transmission while removing the mounting bolts․ Slowly lower the transmission and slide it out from under the vehicle․ Be cautious‚ as transmissions are heavy and require proper lifting techniques to avoid injury or damage․ Once removed‚ place the transmission on a sturdy workbench for disassembly․ Always refer to the repair manual for specific instructions tailored to your vehicle’s make and model;
Disassembling the Transmission Case
Disassembling the transmission case is a meticulous process that requires precision and care․ Start by preparing your workspace with essential tools like wrenches‚ screwdrivers‚ punches‚ and a press․ Remove all bolts holding the case together‚ referring to repair manuals for specific guidance․ Gently tap the case apart with a hammer to avoid damaging internal components․ Label each part as you remove it to ensure proper reassembly․ Wear safety glasses to protect against flying parts․ Use specialized tools like a bearing puller to avoid damaging bearings․ Organize removed parts in trays to keep track of them․ Clean each component to prevent contamination․ Proceed slowly‚ double-checking each step to maintain accuracy․ Documenting the process with notes or pictures can aid in reassembly․ Stay organized and patient to ensure a successful rebuild․
Removing the Gear Set and Bearings
Removing the gear set and bearings requires precision and care to avoid damaging these critical components․ Begin by securing the transmission case in a vise to maintain stability․ Use a bearing puller or slide hammer to safely extract bearings‚ as they are typically pressed-fit․ Gently pry gears away from the shafts‚ ensuring not to bend or scratch the splines․ For stubborn parts‚ apply heat with a hairdryer or heat gun to expand the metal slightly․ Once removed‚ inspect the case for any debris or scoring‚ which may indicate the need for replacement․ Clean all components with solvent and compressed air to prepare for inspection and reassembly․ Store bearings and gears in labeled trays to maintain organization․ Always refer to the repair manual for specific torque specifications and reinstallation procedures․ This step is crucial for ensuring the transmission operates smoothly post-rebuild․
Detaching the Input and Output Shafts
Detaching the input and output shafts is a delicate step in the manual transmission rebuild process․ Start by marking the shafts and their respective positions to ensure proper realignment during reassembly․ Use a bearing puller or slide hammer to remove the input shaft‚ working carefully to avoid bending or warping the splines․ For the output shaft‚ apply a small amount of heat to the area where it connects to the transmission case‚ as this can help loosen any corrosion or stubbornness․ Once free‚ pull the shaft straight out‚ taking care not to damage the seals or bearings․ Store both shafts in a clean‚ dry place‚ protected from debris․ Inspect the splines and bearings for wear or damage‚ as these parts may need replacement․ Proper removal and storage ensure the shafts remain in good condition for reinstallation․ This step requires patience and precision to avoid costly mistakes․
Inspection and Assessment
Inspecting the transmission involves evaluating gear teeth‚ checking bearings for wear‚ and examining the clutch․ This critical step identifies parts needing replacement or repair‚ ensuring a successful rebuild․
Evaluating Gear Teeth and Synchronizers
Evaluating gear teeth and synchronizers is a critical step in the transmission rebuild process․ Start by visually inspecting the gear teeth for signs of wear‚ such as chipping‚ pitting‚ or excessive scoring․ Check the synchronizers for damage or excessive wear‚ as these components are essential for smooth gear transitions․ Use a micrometer to measure gear tooth thickness and compare it to the manufacturer’s specifications․ If the teeth are worn beyond acceptable limits‚ the gears must be replaced․ Similarly‚ if synchronizers are damaged or show significant wear‚ they should be replaced to ensure proper shifting․ Pay attention to the condition of the synchronizer rings and hubs‚ as these often bear the brunt of stress during shifting․ If any parts are questionable‚ it’s best to err on the side of caution and replace them․ This step ensures the transmission will function smoothly and reliably after reassembly․
Checking Bearings and Bushings for Wear
Checking bearings and bushings for wear is a vital part of the transmission rebuild process․ Bearings are critical for smooth gear rotation‚ while bushings reduce friction and prevent metal-to-metal contact․ Start by visually inspecting each bearing for signs of pitting‚ cracking‚ or excessive wear․ Use a micrometer to measure bearing diameters and compare them to the manufacturer’s specifications․ If bearings are worn or damaged‚ they must be replaced to ensure proper transmission operation․ Similarly‚ inspect bushings for excessive wear or deformation․ If a bushing is worn beyond acceptable limits‚ it should be replaced to prevent gear misalignment and premature wear on other components․ Pay special attention to the input and output shaft bearings‚ as these are often the most stressed․ Worn bearings or bushings can lead to noise‚ vibration‚ and eventual transmission failure‚ making this step crucial for a successful rebuild․
Inspecting the Clutch and Pressure Plate
Inspecting the clutch and pressure plate is essential to ensure proper transmission function․ Begin by examining the clutch disc for excessive wear‚ warping‚ or glazing․ Measure the thickness of the clutch disc and compare it to the manufacturer’s specifications; If it’s below the minimum threshold‚ replace it․ Next‚ inspect the pressure plate for signs of wear‚ such as scoring or cracks․ Check the pressure plate’s alignment and ensure it’s functioning correctly․ If the pressure plate is damaged or worn‚ it must be replaced to maintain consistent clutch engagement․ Additionally‚ inspect the clutch release bearing and fork for smooth operation and freedom from play․ Any damage or excessive wear in these components can lead to poor shifting‚ clutch slippage‚ or failure to engage gears properly․ Replacing worn or damaged parts ensures reliable performance and prevents further transmission issues down the road․
Rebuilding and Reassembly
Rebuilding and reassembly require careful attention to detail‚ ensuring all components are properly aligned and secured․ This step involves replacing worn or damaged parts to restore smooth operation․
Replacing Worn or Damaged Parts
Replacing worn or damaged parts is crucial for ensuring the transmission functions properly․ Begin by identifying components that show signs of wear‚ such as gear teeth‚ synchronizers‚ and bearings․ Use a micrometer to measure parts against factory specifications to determine if replacement is needed․ Install new parts according to the manufacturer’s instructions‚ applying grease where necessary to ensure smooth operation․ Pay particular attention to the clutch and pressure plate‚ as these are common points of failure․ Replace any seals or gaskets to prevent leaks and ensure proper lubrication․ Once all replacements are made‚ double-check each component to ensure it is securely fastened and properly aligned before proceeding to reassembly․
Reinstalling the Gear Set and Bearings
Reinstalling the gear set and bearings requires precision to ensure proper alignment and smooth operation․ Begin by cleaning the transmission case and shafts thoroughly․ Apply a thin layer of high-temperature grease to the bearings and press them into place using a bearing installer or a suitable tool․ Carefully slide the gear set onto the shafts‚ ensuring each gear meshes correctly․ Use a dial indicator to check for proper alignment and end play․ For main bearings‚ apply grease liberally and align them with the transmission case․ Tighten all bolts gradually to the specified torque to avoid uneven stress․ Once installed‚ rotate the gears by hand to verify smooth operation and check for any grinding or binding․ Proper installation ensures the transmission will function efficiently and reliably after reassembly․
Reassembling the Transmission Case
Reassembling the transmission case requires careful alignment and precision to ensure a leak-free seal and proper gear engagement․ Begin by thoroughly cleaning both case halves to remove any debris or old gasket material․ Apply a thin layer of high-temperature RTV sealant to the mating surfaces‚ following the manufacturer’s instructions․ Align the case halves carefully‚ ensuring all dowel pins are seated correctly․ Use a torque wrench to tighten the case bolts in a star pattern‚ gradually increasing torque to the specified value (typically 30-40 ft-lbs)․ Once the case is secured‚ reinstall the main bearings‚ applying a liberal amount of grease to ensure smooth rotation․ Check the end play using a dial indicator to confirm it is within the manufacturer’s specifications․ Finally‚ reinstall any additional components‚ such as the shift fork assembly or synchro rings‚ and lubricate all moving parts thoroughly․ Test the transmission’s operation before reinstalling it in the vehicle․
Aligning and Securing the Input and Output Shafts
Aligning and securing the input and output shafts is a critical step in the transmission rebuild process․ Begin by ensuring the shafts are properly seated within their respective bearings and that all splines are clean and free of debris․ Use a dial indicator to check the shafts’ end play‚ adjusting as necessary to meet the manufacturer’s specifications․ Apply a small amount of high-temperature grease to the splines and bearings to ensure smooth engagement and rotation․ Once aligned‚ secure the shafts using the appropriate retaining clips or nuts‚ tightening them to the recommended torque value․ Double-check the alignment by manually rotating the shafts to ensure they move freely without binding․ Proper alignment and securing of these components are essential for smooth gear engagement and overall transmission performance․
Testing and Final Adjustments
After reassembly‚ refill the transmission fluid and test the vehicle in a controlled environment; Check for smooth shifting‚ proper gear engagement‚ and any signs of leaks․ Fine-tune the clutch and shifter for optimal performance․
Refilling Transmission Fluid
Refilling transmission fluid is a critical step after rebuilding a manual transmission․ Locate the transmission fluid reservoir‚ usually under the hood‚ and check the fluid level using the dipstick or sight glass․ Ensure the level is within the recommended range‚ as specified in the vehicle’s repair manual․ Use the correct type of transmission fluid recommended by the manufacturer to avoid damage․ Pour the fluid slowly using a funnel to prevent spills․ Add fluid in small increments‚ checking the level frequently to avoid overfilling․ After refilling‚ start the engine and test the transmission in a controlled environment to ensure smooth operation․ Dispose of any used fluid responsibly‚ taking it to a recycling center or an auto parts store that accepts used fluids․
Testing the Transmission in the Vehicle
After reassembling and reinstalling the transmission‚ it’s essential to test it thoroughly in the vehicle․ Start by finding a safe‚ open space‚ such as an empty parking lot‚ to avoid traffic hazards․ Begin with slow‚ controlled movements‚ shifting through all gears‚ including reverse‚ to ensure smooth operation․ Pay attention to any unusual noises‚ vibrations‚ or resistance during shifting․ Check for leaks around the transmission and drivetrain connections․ Gradually increase speed‚ testing acceleration and deceleration to verify proper gear engagement․ If equipped with a clutch‚ ensure it engages and disengages smoothly at various speeds․ Test uphill and downhill driving to assess low gear functionality․ If any issues arise‚ such as slipping or grinding‚ stop immediately and investigate the cause․ Document any problems and consult your repair manual or a professional if needed․
Adjusting the Clutch and Shifter
After rebuilding and reinstalling the transmission‚ proper adjustment of the clutch and shifter is crucial for smooth operation․ Start by ensuring the clutch pedal has the correct free play‚ typically specified in your vehicle’s repair manual․ Adjust the clutch master and slave cylinders to achieve proper engagement and disengagement․ Next‚ inspect the shifter linkage and ensure it is aligned correctly with the transmission’s gear selector․ Tighten all bolts and adjust the shifter’s position to eliminate excessive play․ Test the clutch by pressing it fully and shifting through all gears‚ including reverse‚ to confirm smooth engagement․ If the clutch engages too high or low‚ adjust the pedal height and free play accordingly․ Finally‚ check for any grinding or hesitation during gear changes‚ as this may indicate misalignment or improper adjustment․ If issues persist‚ consult your repair manual or seek professional assistance․
Regular maintenance is key to extending the life of your rebuilt manual transmission․ Check transmission fluid levels‚ inspect for leaks‚ and monitor gear engagement․ Address any issues promptly to ensure smooth performance and longevity․
Post-Rebuild Maintenance and Care
After successfully rebuilding your manual transmission‚ regular maintenance is crucial to ensure its longevity and performance․ Start by checking the transmission fluid level regularly‚ as low levels can lead to premature wear․ Look for any signs of leaks around the seals and gaskets‚ addressing them immediately to prevent fluid loss․ Monitor the gear engagement and shifting smoothness; any unusual noises or hesitation should be investigated promptly․ Additionally‚ avoid extreme driving conditions‚ such as rapid acceleration or deceleration‚ which can stress the transmission․ Consider having your vehicle inspected by a professional every 30‚000 to 50‚000 miles to catch potential issues early․ By following these steps‚ you can maintain your rebuilt transmission and enjoy reliable service for years to come․
 rivian r1t owners manual
  magic bullet user manual
  honeywell rth2300 operating manual
  ford ranger manual gearbox
  manual d calculation
  safety first grow and go manual
  earth day word search pdf
  novels pdf in tamil
  wow cataclysm classic enchanting guide
  candy smart washing machine manual